


Table Of Contents


Step 1 — Installing Jenkins
The version of Jenkins included with the default Ubuntu packages is often behind the latest available version from the project itself. To ensure you have the latest fixes and features, use the project-maintained packages to install Jenkins.
First, add the repository key to your system:
wget -q -O - https://pkg.jenkins.io/debian-stable/jenkins.io.key |sudo gpg --dearmor -o /usr/share/keyrings/jenkins.gpg
The gpg —dearmor command is used to convert the key into a format that apt recognizes. Next, let’s append the Debian package repository address to the server’s sources.list:
sudo sh -c 'echo deb [signed-by=/usr/share/keyrings/jenkins.gpg] http://pkg.jenkins.io/debian-stable binary/ > /etc/apt/sources.list.d/jenkins.list'
Finally, install Jenkins and its dependencies:
sudo apt updatesudo apt install jenkins
Step 2 — Starting Jenkins
now that Jenkins is installed, start it by using systemctl:
sudo systemctl start jenkins.service
Since systemctl doesn’t display status output, we’ll use the status command to verify that Jenkins started successfully:
sudo systemctl status jenkins
Step 3 — Opening the Firewall
To set up a UFW firewall, visit Initial Server Setup with Ubuntu 22.04, Step 4- Setting up a Basic Firewall. By default, Jenkins runs on port 8080. Open that port using ufw:
sudo ufw allow 8080
sudo ufw allow OpenSSHsudo ufw enable
Check ufw’s status to confirm the new rules:
sudo ufw status
Step 4 — Setting Up Jenkins
To set up your installation, visit Jenkins on its default port, 8080, using your server domain name or IP address: http://your_server_ip_or_domain:8080
You should receive the Unlock Jenkins screen, which displays the location of the initial password:
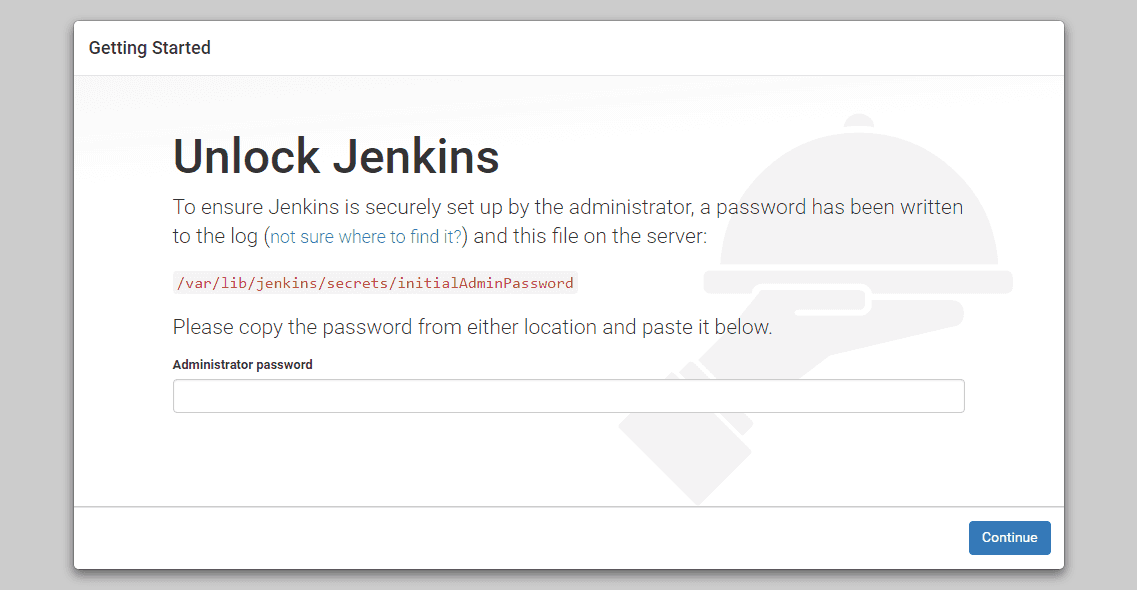
In the terminal window, use the cat command to display the password:
sudo cat /var/lib/jenkins/secrets/initialAdminPassword
Copy the 32-character alphanumeric password from the terminal and paste it into the Administrator password field, then click Continue.
The next screen presents the option of installing suggested plugins or selecting specific plugins:
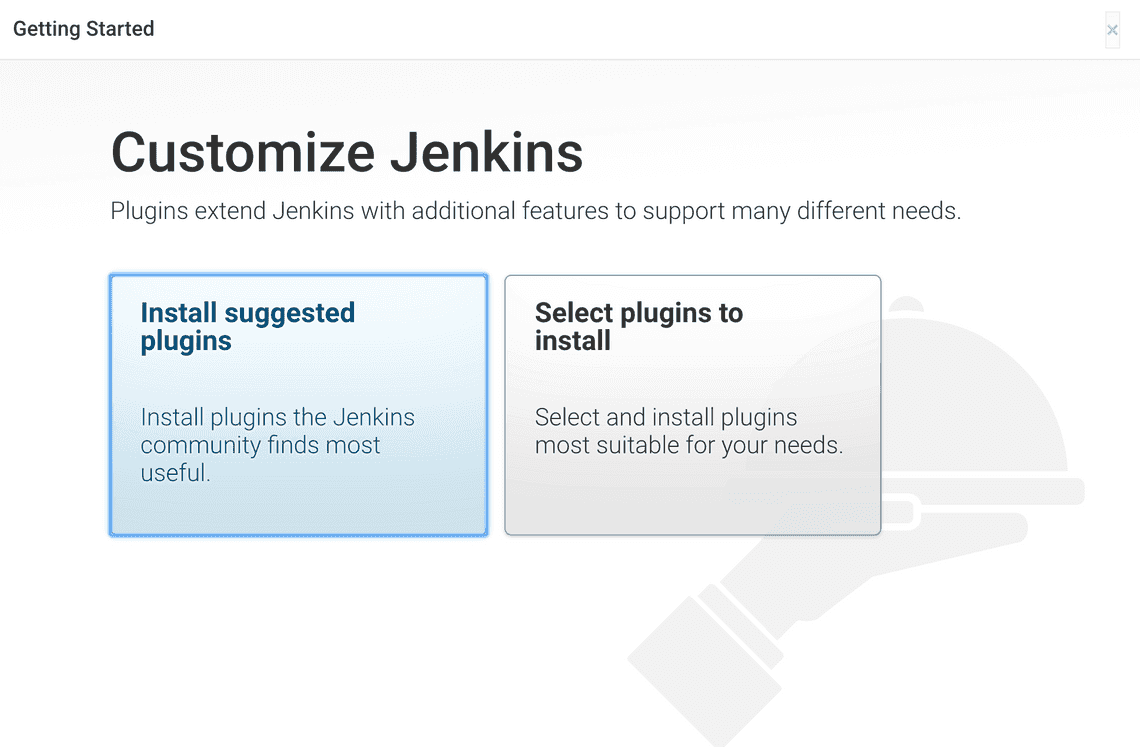
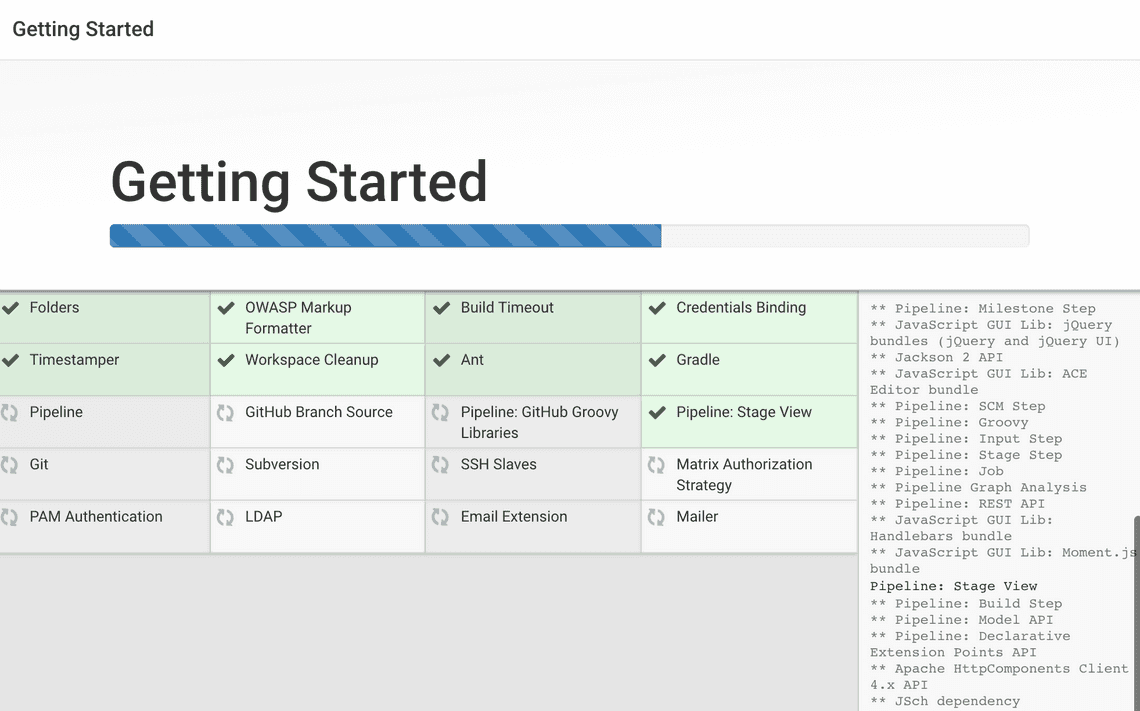
We’ll click the Install suggested plugins option, which will immediately begin the installation process.
Note: The default Jenkins server is NOT encrypted, so the data submitted with this form is not protected. Refer to How to Configure Jenkins with SSL Using an Nginx Reverse Proxy on Ubuntu 22.04 to protect user credentials and information about builds that are transmitted via the web interface.
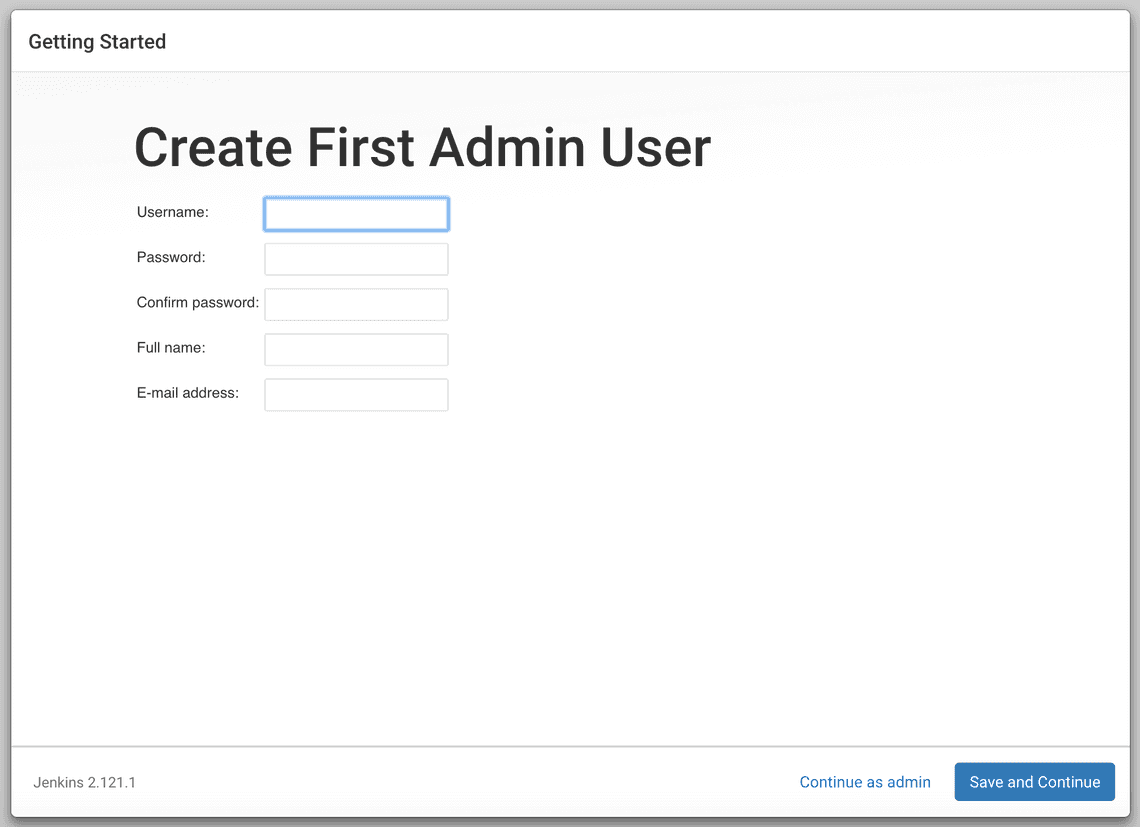
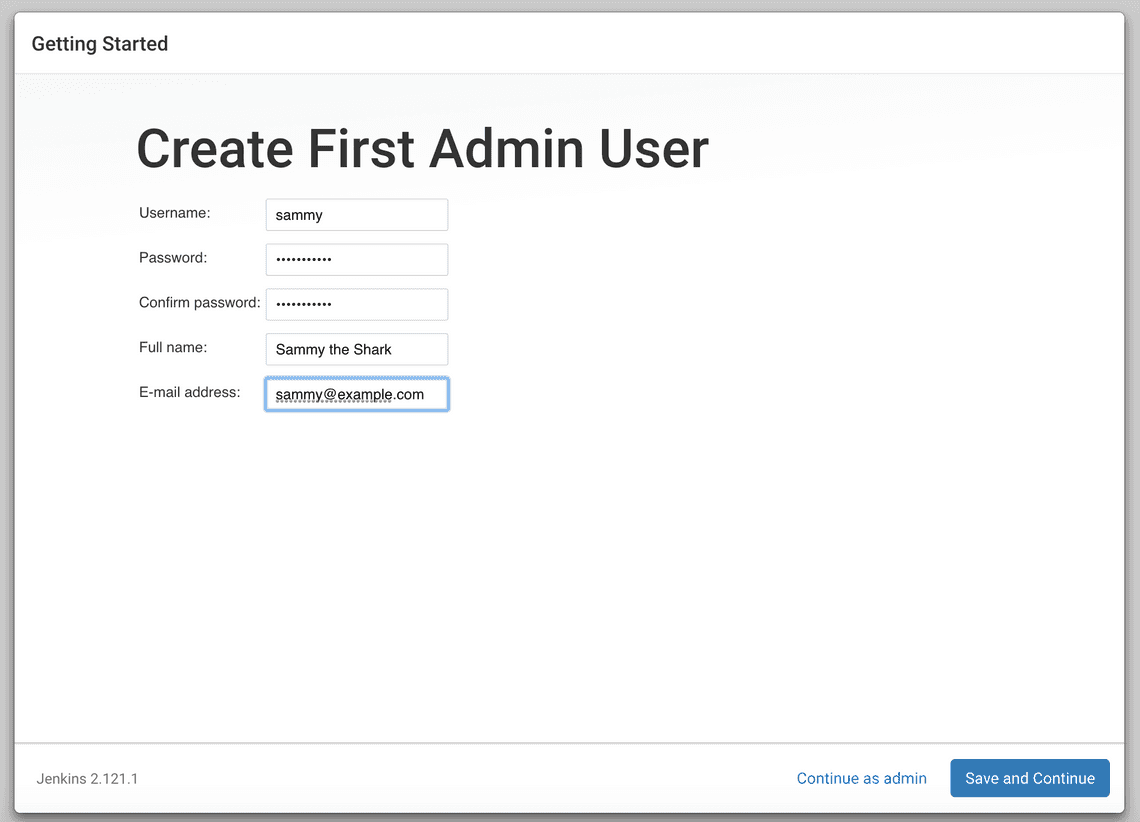
Enter the name and password for your user:
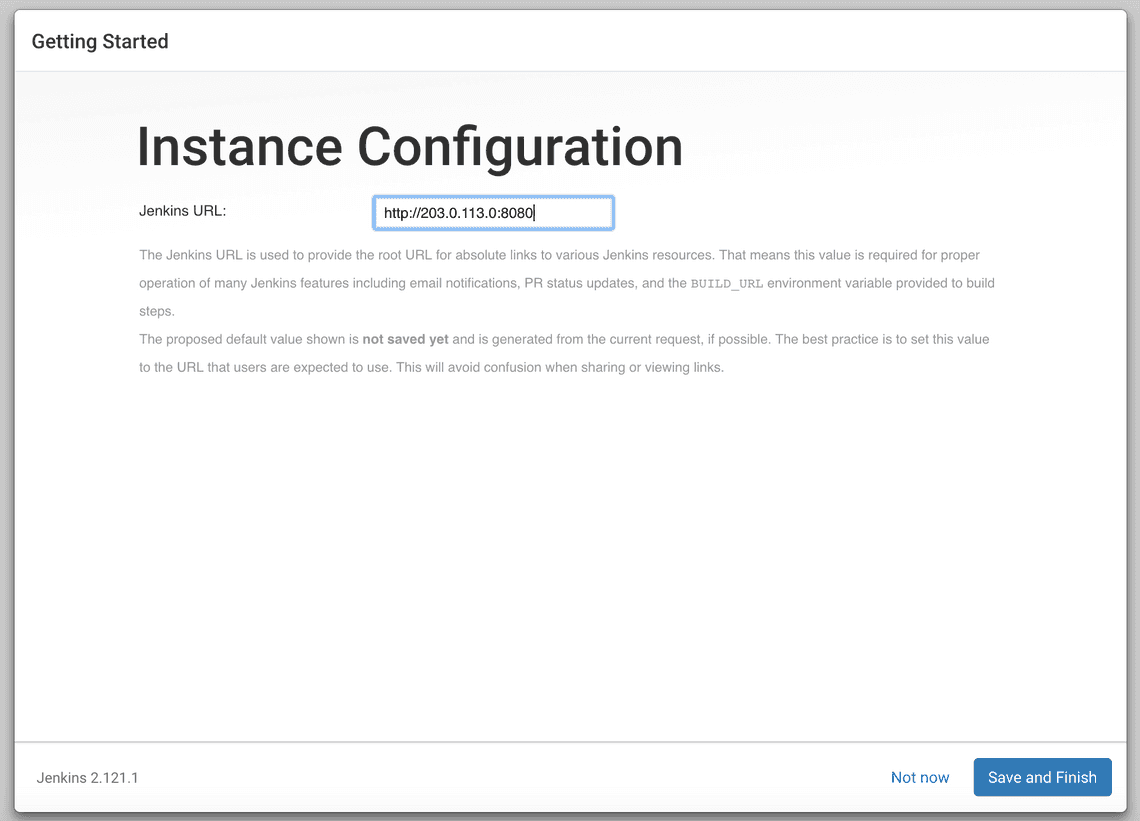
You’ll receive an Instance Configuration page that will ask you to confirm the preferred URL for your Jenkins instance. Confirm either the domain name for your server or your server’s IP address:
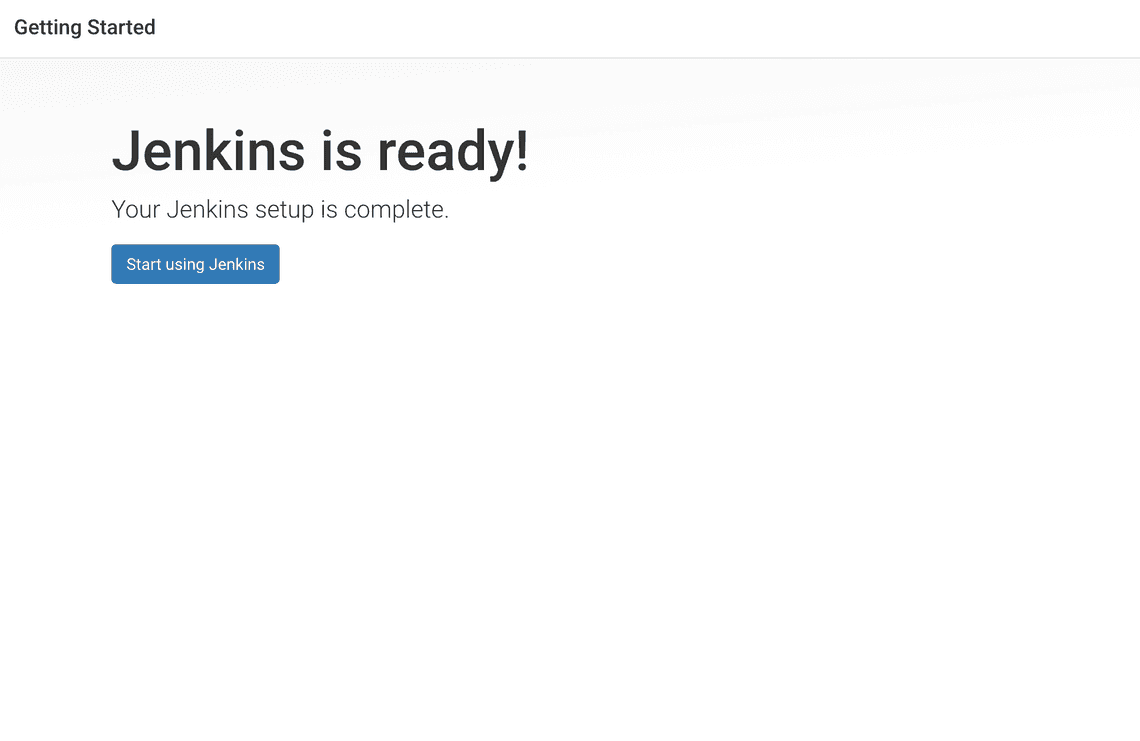
After confirming the appropriate information, click Save and Finish. You’ll receive a confirmation page confirming that “Jenkins is Ready!”:
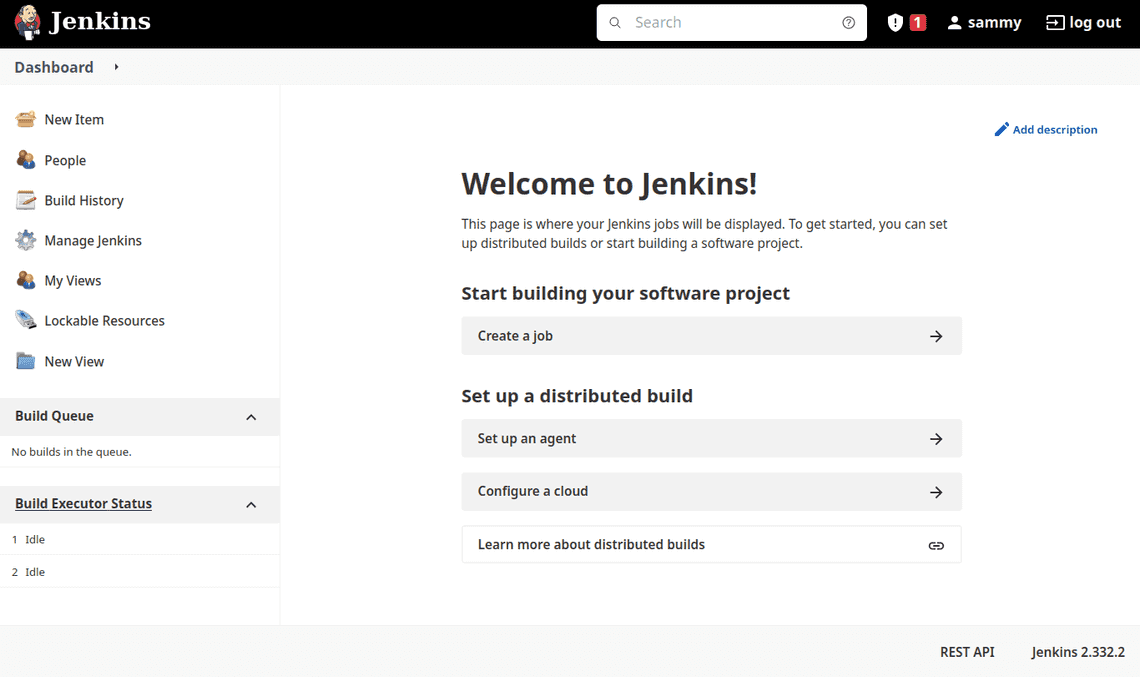
Click Start using Jenkins to visit the main Jenkins dashboard:
Step 5 — Configuring Nginx
By default, Jenkins comes with its own built-in Winstone web server listening on port 8080, which is convenient for getting started. It’s also a good idea, however, to secure Jenkins with SSL to protect passwords and sensitive data transmitted through the web interface.
In this tutorial, you will configure Nginx as a reverse proxy to direct client requests to Jenkins.
sudo nano /etc/nginx/sites-available/example.com
. . .server {. . .# SSL Configuration#listen [::]:443 ssl ipv6only=on; # managed by Certbotlisten 443 ssl; # managed by Certbotaccess_log /var/log/nginx/jenkins.access.log;error_log /var/log/nginx/jenkins.error.log;. . .}
Next configure the proxy settings. Since all requests are being sent to Jenkins, comment out the default try_files line, which would otherwise return a 404 error before the request reaches Jenkins:
. . .location / {# First attempt to serve request as file, then# as directory, then fall back to displaying a 404.# try_files $uri $uri/ =404; }. . .
Let’s now add the proxy settings, which include:
proxy_params: The /etc/nginx/proxy_params file is supplied by Nginx and ensures that important information, including the hostname, the protocol of the client request, and the client IP address, is retained and available in the log files.
proxy_pass: This sets the protocol and address of the proxied server, which in this case will be the Jenkins server accessed via localhost on port 8080.
proxy_read_timeout: This enables an increase from Nginx’s 60 second default to the Jenkins-recommended 90 second value.
proxy_redirect: This ensures that responses are correctly rewritten to include the proper host name.
Be sure to substitute your SSL-secured domain name for example.com in the proxy_redirect line below:
Location /. . .location / {# First attempt to serve request as file, then# as directory, then fall back to displaying a 404.# try_files $uri $uri/ =404;include /etc/nginx/proxy_params;proxy_pass http://localhost:8080;proxy_read_timeout 90s;# Fix potential "It appears that your reverse proxy setup is broken" error.proxy_redirect http://localhost:8080 https://example.com;
Once you’ve made these changes, save the file and exit the editor. We’ll hold off on restarting Nginx until after we’ve configured Jenkins, but we can test our configuration now:
sudo nginx -t
Step 6 — Configuring Jenkins
For Jenkins to work with Nginx, you will need to update the Jenkins configuration so that the Jenkins server listens only on the localhost interface rather than on all interfaces (0.0.0.0). If Jenkins listens on all interfaces, it’s potentially accessible on its original, unencrypted port (8080).
Let’s modify the /etc/default/jenkins configuration file to make these adjustments:
sudo nano /etc/default/jenkins
Locate the JENKINS_ARGS line and add —httpListenAddress=127.0.0.1 to the existing arguments:
. . .JENKINS_ARGS="--webroot=/var/cache/$NAME/war --httpPort=$HTTP_PORT --httpListenAddress=127.0.0.1"
To use the new configuration settings, restart Jenkins:
sudo systemctl restart jenkins
Check the status:
sudo systemctl status jenkins
Output● jenkins.service - Jenkins Continuous Integration ServerLoaded: loaded (/lib/systemd/system/jenkins.service; enabled; vendor preset: enabled)Active: active (running) since Mon 2022-04-18 16:35:49 UTC; 2s agoMain PID: 89751 (java)Tasks: 44 (limit: 4665)Memory: 358.9MCPU: 20.195sCGroup: /system.slice/jenkins.service└─89751 /usr/bin/java -Djava.awt.headless=true -jar /usr/share/java/jenkins.war --webroot=/var/cache/jenkins/war --httpPort=8080
Step 7 — Testing the Configuration
You can enter the administrative username you created in How To Install Jenkins on Ubuntu 22.04 in the User field, and the password that you selected in the Password field.
Once logged in, you can change the password to be sure it’s secure.
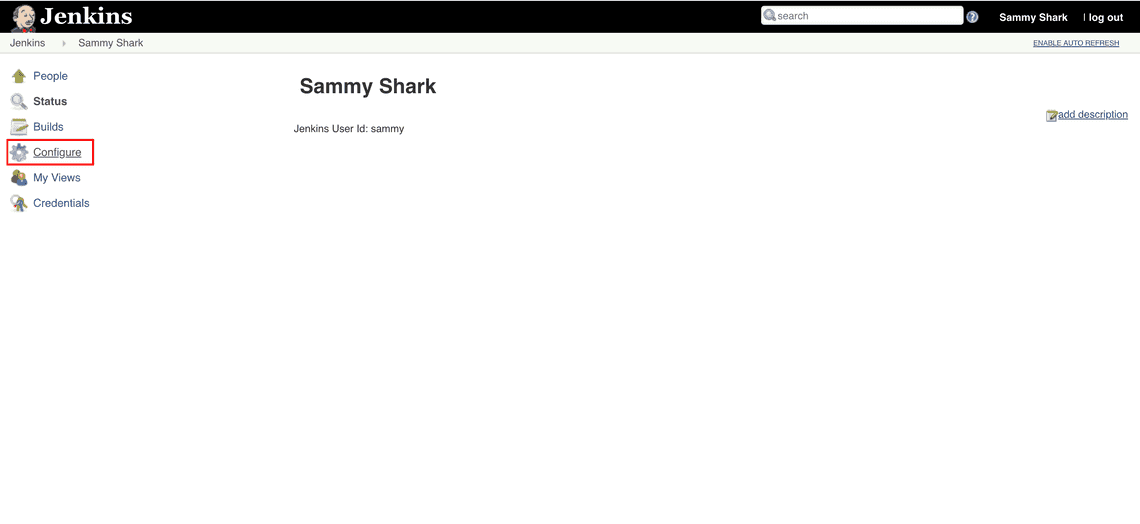
Click on your username in the upper-right-hand corner of the screen. On the main profile page, select Configure from the list on the left side of the page:
This will take you to a new page, where you can enter and confirm a new password:
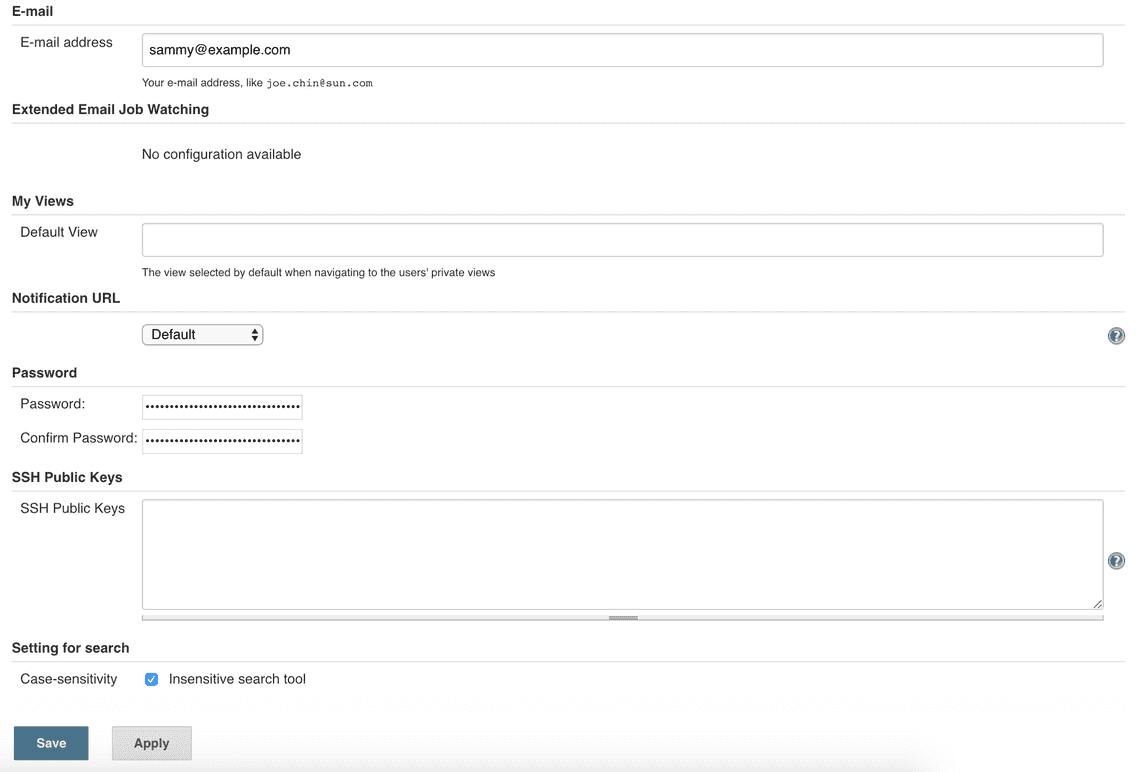
Confirm the new password by clicking Save. You can now use the Jenkins web interface securely.
In this tutorial, you configured Nginx as a reverse proxy to Jenkins’ built-in web server to secure your credentials and other information transmitted via the web interface. Now that Jenkins is secure, you can learn how to set up a continuous integration pipeline to automatically test code changes. Other resources to consider if you are new to Jenkins are the Jenkins project’s “Creating your first Pipeline” tutorial or the library of community-contributed plugins.
Share

Related Posts


